Blog Layout
Hiking Mt Baldy
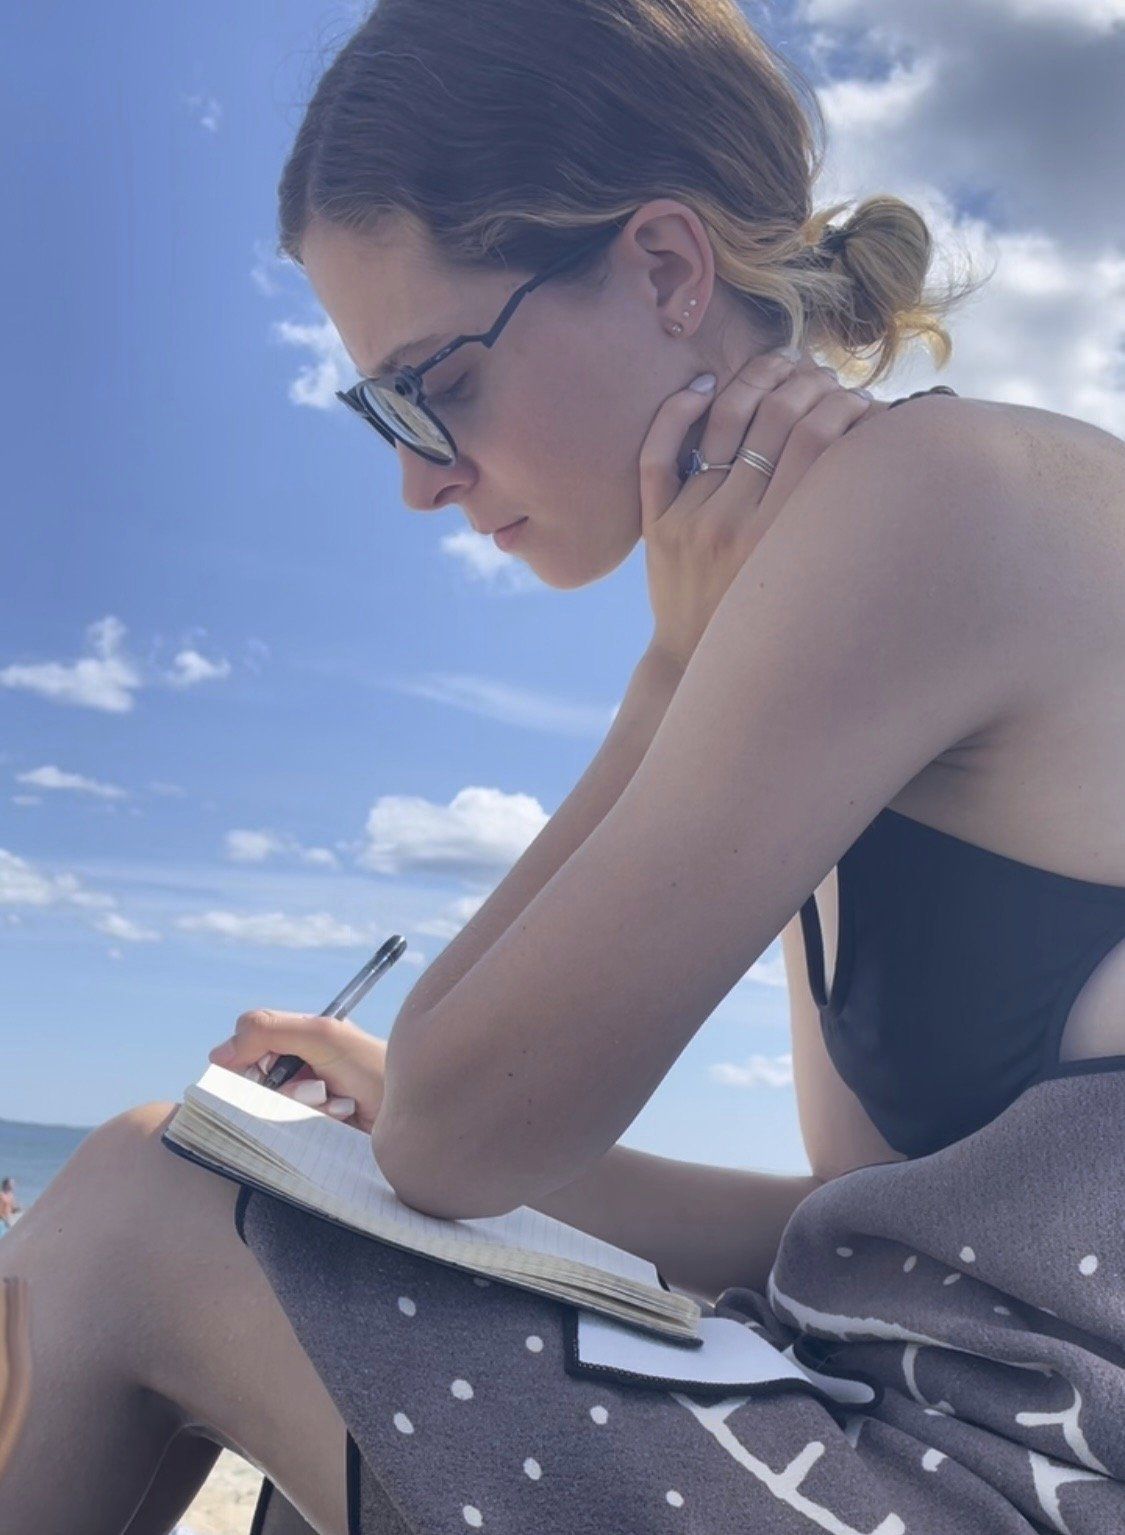
Amelia Rogers
Mt. Baldy
Mt. Baldy is a wonderful hike full of spectacular views and elevation gains that take your breath away (literally). The hike is one of the top 5 highest Mountains in Southern California, with an elevation of 10,064 ft.
There are several parts on this hike that are incredibly steep and would not be safe in winter conditions. We hiked Mt. Baldy in June and there was still snow at the top so be prepared.
This is an 11-mile hike that takes about 7 hours to complete. To start you will want to get there early not only to start the hike during cooler weather temperatures but also to be able to get good parking. You might have to circle around the lot a couple times to find some if you come even around 9 AM the lot gets full. Once you find parking it’s best to use the bathroom at the bottom before setting off as the first couple hours of the hike there is no place to go except the wilderness.
The beginning trek is easy, it’s paved then turns to a dirt path that is fairly wide and well-traveled. It is a lot of switchbacks as you ascend to the first major landmark point, which is the ski lodge. This is a good place to get some lunch or enjoy your lunch and go to the bathroom. They have plenty of picnic tables to get at both inside and outside. It’s a good mid-point to take a breather. The views here are starting to be beautiful.
For those who are looking for an even easier start to this point there is a ski lift that will take you up the first part of the mountain. It does cost money and only runs at certain hours that vary so be sure to check online if this is your plan.
Once you have enjoyed a break, you head to one of the more challenging parts of the hike, in my opinion, the ascent to the next section is incredibly steep and if you’re there on a cloudy day you will quite literally leave the clouds or go through them during this portion of the hike. Be sure to have plenty of water and take your side going through this part, it’s not crazy long but it doesn’t feel that way.
After you summit this section it’s nice and flat in and out of the woods, you’ll start getting some truly amazing views along this part of the hike. The next notable portion is called the Devil’s Backbone. This is an amazing stretch where you can look down thousands of feet on both sides of you while you hike this backbone. In the summer this is quite safe but, in the winter, this is a section that needs to be handled with extreme caution if you proceed.
The end of Devil’s Backbone is a very sketchy part where you are looking straight down basically hugging the side of the wall as you move around a big bend on rocks that are constantly shifting. This leads to a very safe trail once you are around the bend, but this part gave me pause as I looked in the abyss below me.
From there it’s rather flat until the final assent to the actual summit. This is another part where you want to go slow and make sure you have enough oxygen. There were several people who were not able to go past here as the altitude sickness begin to kick in. Take it slow and be sure to drink enough water.
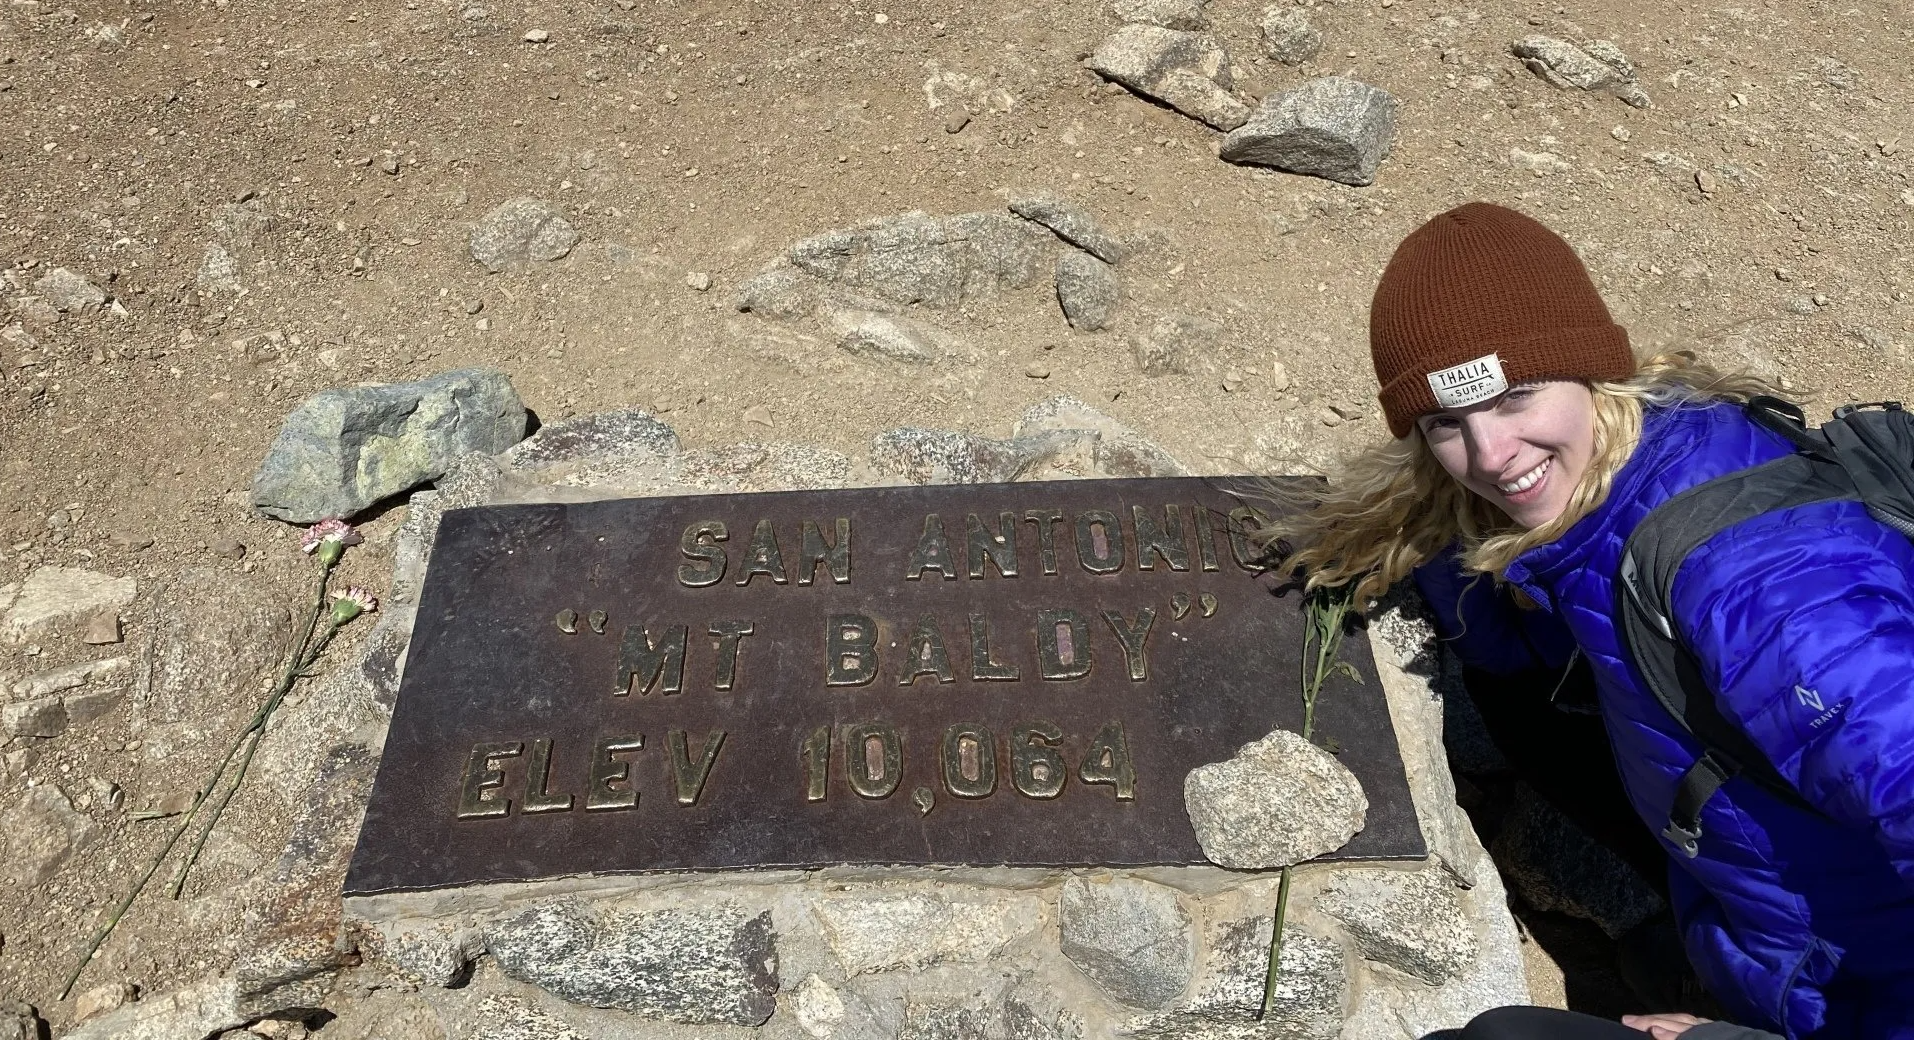
This section was still covered in snow in June for us so be prepared with some warmer gear as you might get hit with some end of winter weather at and near the top. The entire remaining hike up you have stunning views so you can truly take it in the whole way. Once you summit it’s a large flat area at the top to relax and enjoy some 360-degree views. There is also a sign as pictured above that you can get a picture with to enjoy your success!
There are two options when heading down the mountain, you can go the way you just came, or you can go down a steeper route. This is the option we went for, called Ski Hut or Manker Flat. It is a very steep descent to the hut where there is a bathroom but if you’re like me you’d rather go in the woods. This is where a good-fitting pair of shoes is essential for your comfort. There are rocks you’ll be partially sliding down, and you don’t want your toes slamming into the front of your shoes.
A majority after the beginning is normal hiking terrain but the beginning is a lot of loose rocks and comfort is so important since your feet will already be a bit of pain from the hike up. This trail will lead you right back to the gravel widened road from the beginning and then the paved road straight on to the parking lot. It is steeper and more aggressive switchbacks, but the views are stunning a majority of the way down.
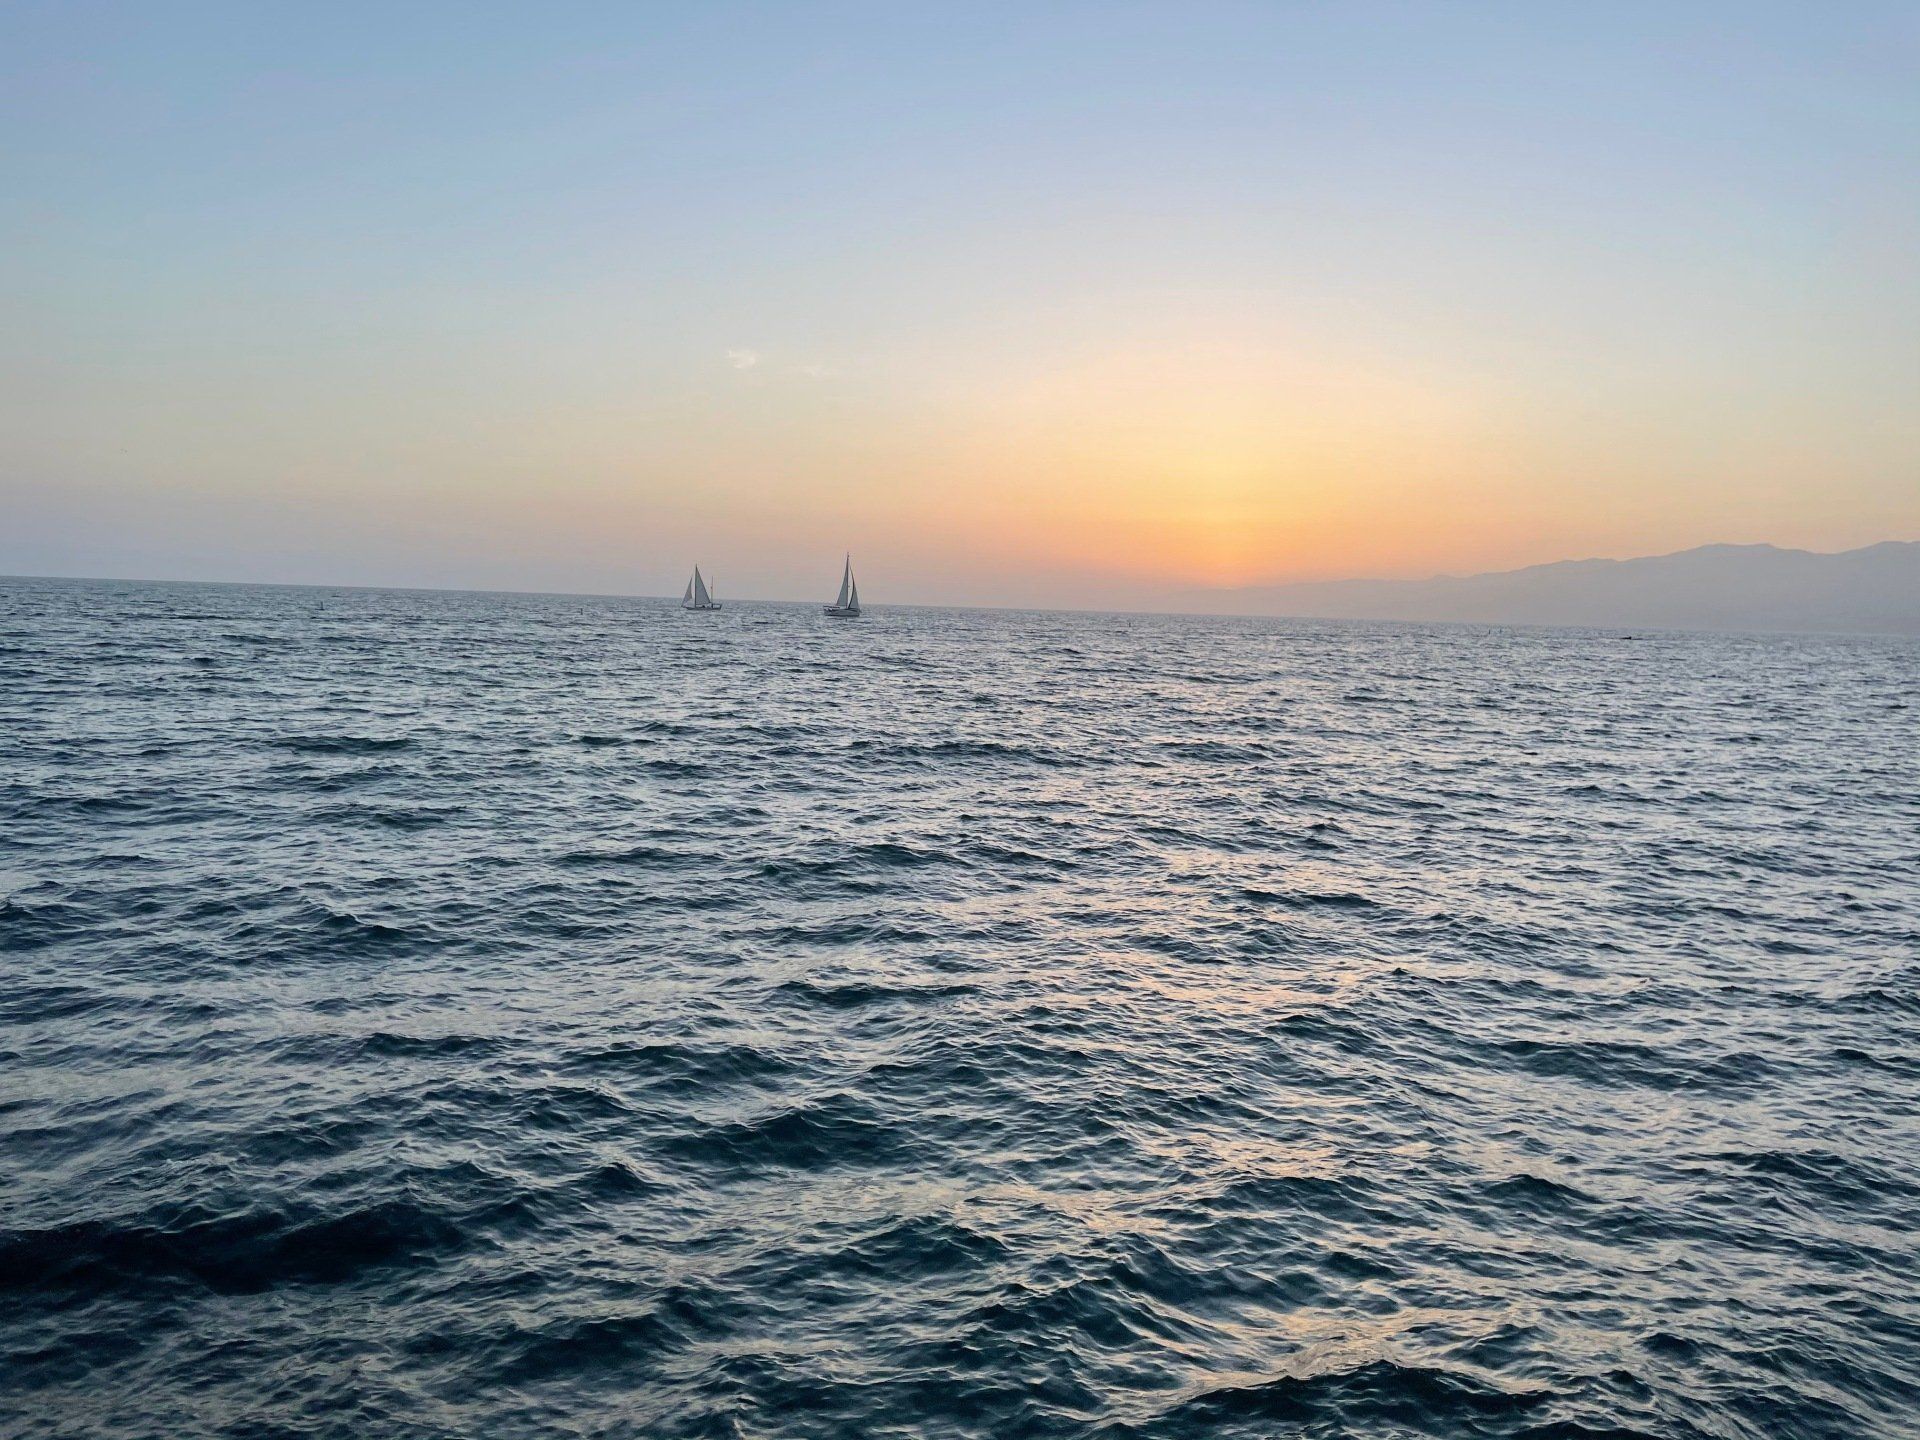
There are also a couple food options at the bottom and a great live music/bar area so if you have some time to spare enjoy some well-earned food with friends. Then you’ll leave the park with a gorgeous sunset as you head back to sea-level.
If you have any questions or experienced anything awesome on this hike please share below!

3 Things I Wish I'd Known Sooner
Tip of the Week - To Do List's
Moving To California

This has been a bucket list item since I was little. I always wanted to experience the peace of being in a giant floating basket. I have always found it so fascinating that we created a flying balloon that we could travel in. It’s closer to the freedom of flying than being in a plane, in my opinion. You experience the environment around you and get to feel the wind as it blows through your hair. It was amazing feeling the flames on your back knowing they were guiding the direction you were going in. Getting into the basket was exciting, perhaps it was the nerves but just being in a basket was an adventure. From there once everyone was in, I went with my family, the take off began. It was surprisingly the most peaceful lift off the ground. It was as if we were Glenda the good witch just drifting off into the distance. The ground got smaller, and the views became more vast. It was truly breathtaking. We did this balloon ride in Temecula, CA so our views were of the wine country and rolling hills. If you have been to California, you know that it has very gloomy seasons and we unfortunately were starting to experience it once we got up higher. I thought it was a crazy experience, but my parents felt like we needed another hot balloon adventure to truly understand it. What might have tainted it for them? We ended up being in the clouds. Not the way you imagine from Disney but in the I can see nothing but white surrounding us kind of way. It was an out of body realization for me. Everywhere you looked it was white as though direction no longer existed. It felt like I was in a Hot Air Balloon ride on my way to the afterlife. I know I have a weird imagination, but it was such a cool yet baffling feeling. When we descended from the clouds, we were getting closer to our landing zone. I wasn’t sure what to expect but I love roller-coaster and bumpy rides so I was curious if it would be as smooth as everything else had been. It proved to be just as peaceful with a light bounce in between. We came down grazed the ground with a slight bounce until we were a few more feet away and softly landed. Being in wine country the place we launched from brought us back to their winery where we were offered complementary champaign and charcutierie. It was a great way to end the adventure and although I crossed this off my bucket list, I can say I would love to ride one again with my husband at sunset somewhere beautiful. There is no time to live like the present!
6 Tips on Unwinding and Preparing for a New Month

5 Pieces of Advice for College Students
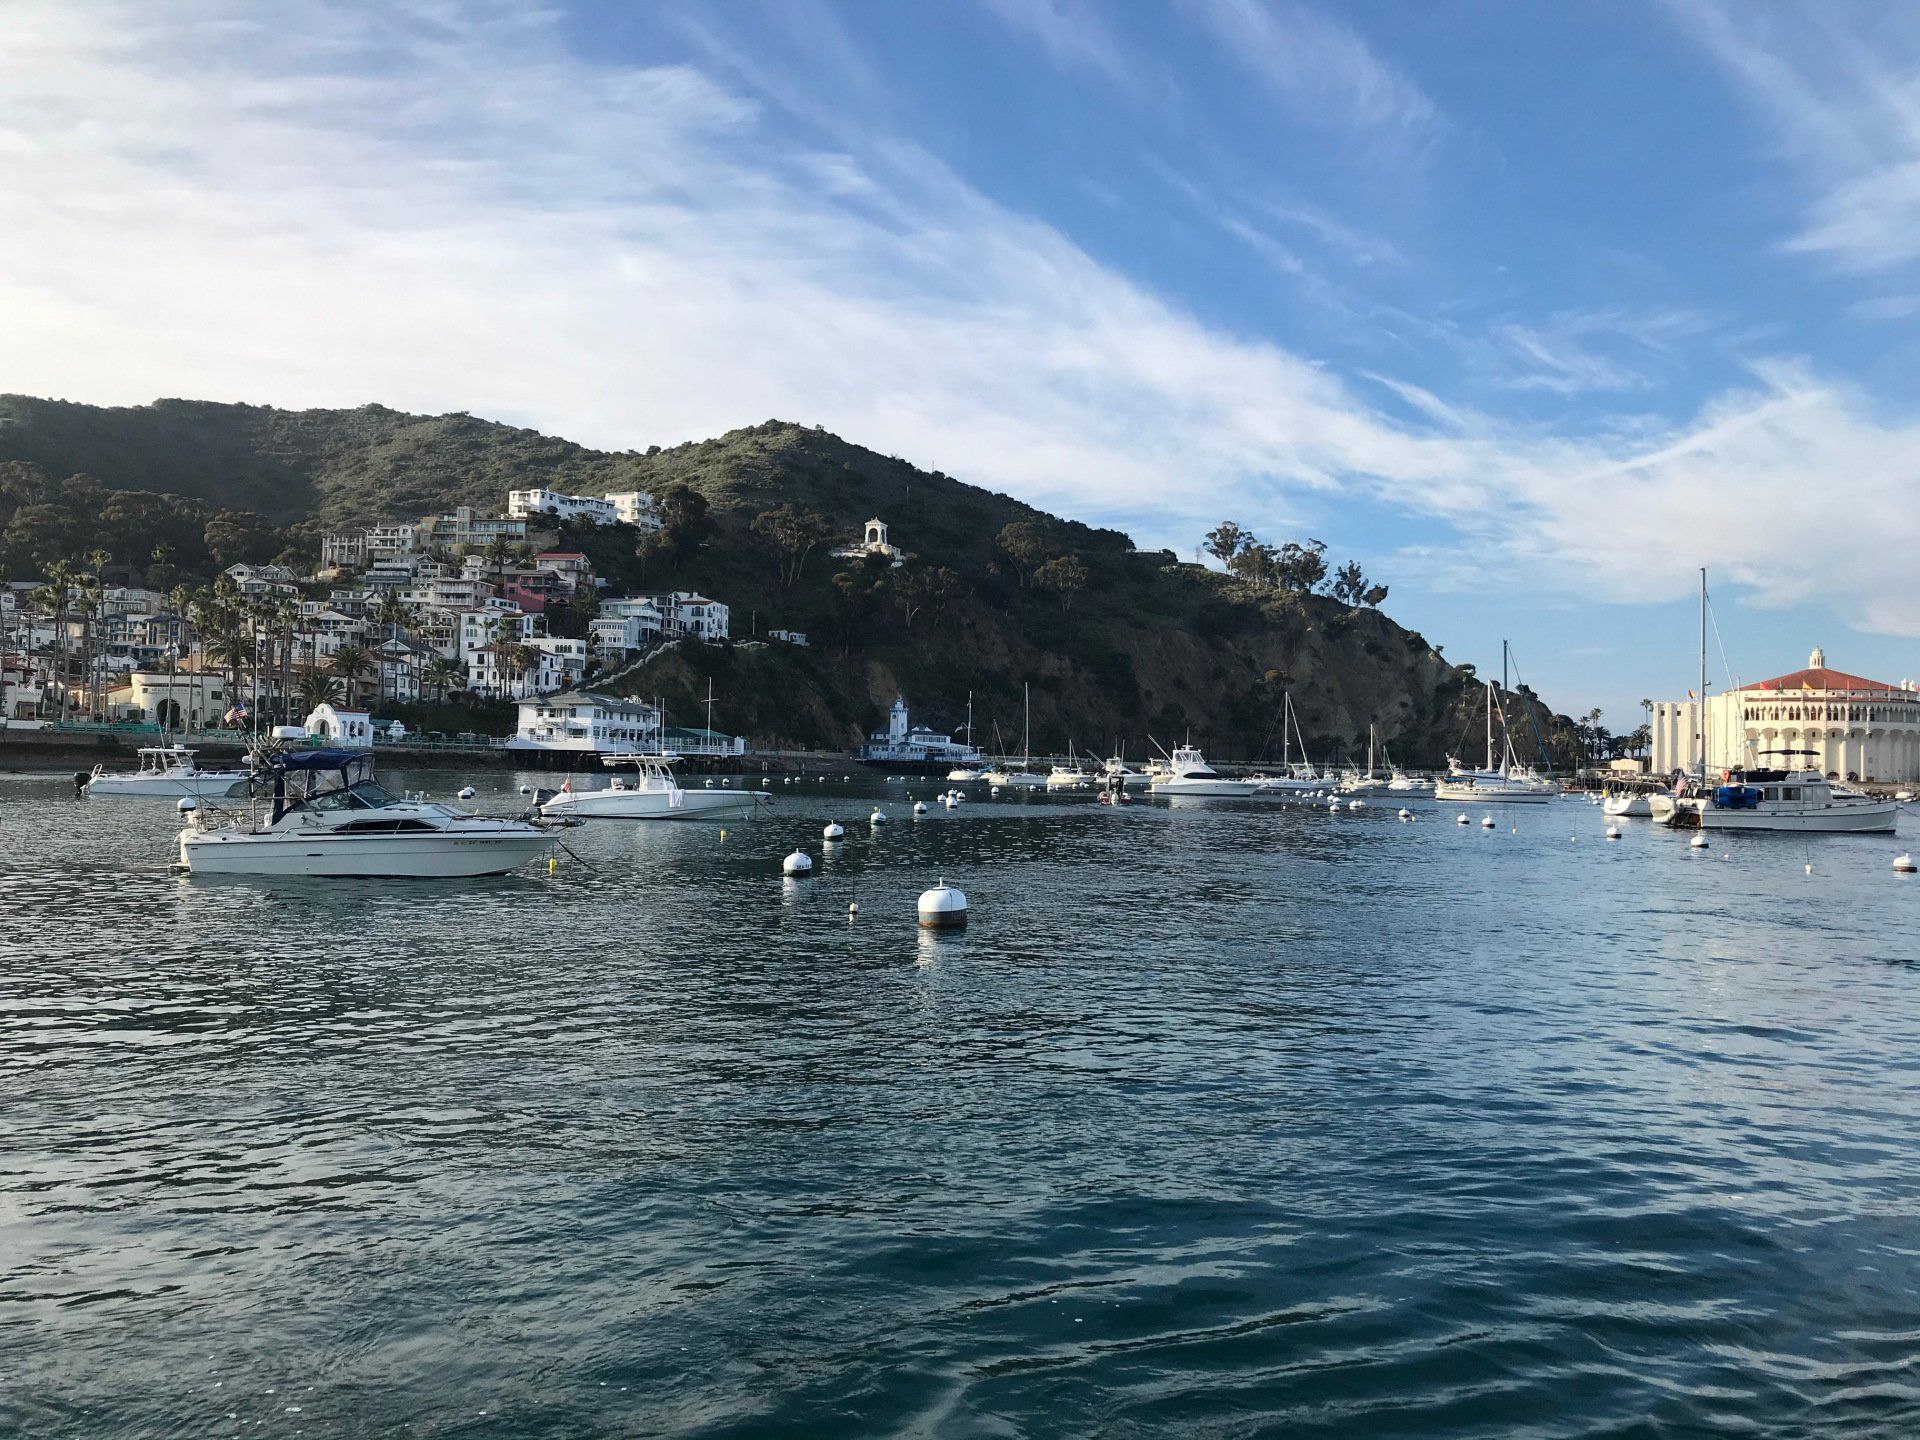
Catalina Island is located off the coast of LA, CA. This island has been known for all sorts of different things throughout it's time. Originally it was a getaway island for famous Hollywood stars and wealthy families. Then it was turned into a movie setting which was a Wild West film. They were the reason for one of the odd attractions of the island, buffalo. The director wanted real life buffalo and had them imported to the island, however as soon as they opened the cages the animals bolted off in different directions. They are now a controlled population on the island as well as a main attraction. Now it is a welcome tourist spot, however it is still quite pricey. I spent a couple of weekends exploring the Avalon side of the island. I have yet to explore Two Harbors. However, Avalon is beautiful. There is so much too pack into a weekend or day of exploration. But first, you must get there. The island has two ports where you can take two different boats in, one is an express boat. The other way to the island, weather permitting, is by helicopter. Aside from these options there really isn't any other way to get to the island. Once there, there are a ton of restaurants and shops to check out. There are beaches where you can layout and enjoy the sun, tiki bar, and relax. If you are looking for more of an adventure they have Scuba boat rides, general boating, fishing, scuba diving, snorkeling, adventure hummer tours, aerial courses, hawk catching experiences, helicopter rides, and more. They are also a great place to rent a golf cart and enjoy putting around going to the spa for the day or laying out by the beach. They do also have a massive Casino; however, this casino isn't for gambling it was for large gatherings and balls in its prime. The building is gorgeous and available for tours. Catalina has so much to offer if you are looking to take a step into a new island experience. It has amazing views of the city that are breathtaking when the light is hitting just right. Catalina Island is a spot worth checking out if you are interested in a weekend getaway somewhere on the west coast. I think it's amazing if you are already located in the area and want to get away. I would recommend it if you were out of area, only if you are okay spending a lot of money for the experience. It is what you make it, but it can be pricey. Let me know if you had any similar experiences or tried any of the amazing adventures. As always, any questions are welcome below!

Recently I was having a conversation with my best friend about public speaking which led me back to my Pecha Kucha (similar to TedTalks) from my freshman year of college. I have always been fascinated with communication styles and tactics both verbally and nonverbally. In college one of my primary focuses was within communications where I was constantly doing public speaking within my classes. I realized that where I might enjoy the challenge and those pre- presentation jitters a lot of people do not. I wanted to bring up my Pecha Kucha because I do talk through different body postures that you can do before a presentation that trick your body into thinking you are in a state of confidence and power. If you are interested in listening it's 6 minutes and 45 seconds of information about non-verbal communication and how it can help shape our lives. When it comes to public speaking there are so many people who talk about pretending the audience is in their underwear or other tips that, for me, never really worked. In truth what made me feel confident going into presentations was all about practice and preparation. I always knew I would nail a presentation if I had my speech basically memorized with the ability to have fun and incorporate some impromptu points. The key isn't to have it completely memorized to the point of sounding like a robot but to have fun with your content. There is always a unique flair that you bring to the table. With all of that being said, there will still be those jitters and nerves in your gut but if you are prepared you can transform those mentally into excitement. When I was getting up to present for the Pecha Kucha I was incredibly nervous but I was also excited and wanted to push myself out of my comfort zone. It was a presentation that I had to apply to, be selected for, and then we were given 6 minutes and 45 seconds to present. I was able to meet some amazing people who were presenting their passions as well. It was held in Colby College and on this particular night there were over 300 people in attendance. The classroom never prepares you for this number of people looking at you with expectations and it can get to you quickly if you let it. But I was prepared and excited to share what I knew about the topic and it went really well. Public speaking is like a muscle that needs to be exercised and the more you prepare and actually present the better you will become. If you have any questions or want to know anything specifically about communications whether in personal or professional life, feel free to reach! https://vimeo.com/72041212

Motivation is one of those magical things that we all want to constantly have to achieve greatness; but what is motivation? I have been going through several different articles, videos, personal experiences, and quotes to try to come up with the perfect way to feel motivation coursing through my veins at all times. The truth is, it isn't that simple. Motivation is fleeting and is not something we can rely on. Motivation is the spark in the beginning but it doesn't keep you going. There lies consistency. When you feel motivated to go after something you've been dreaming about the key is to use that initial momentum to create goals/habits because the motivation won't always be there when you've had a hard day at work or feel the electronics calling. The true key, in my opinion, to achieving anything great or small is creating lasting habits. Consistent actions that you put into place to achieve the end goal. Consistency is the hardest part of many areas in life. It is hard to get into a rhythm were we want to wake up early, go to the gym, eat healthy, write something meaningful, or get after those smaller goals that are the building blocks to our dreams. The daily input can seem tedious and that feeling of motivation can fade to practically nothing, come back in waves, but it can never truly be the one source to keep you going. Don't get me wrong, I think we need that feeling of motivation to get started. I think we need to harness it to put together a plan that is attainable. There are a ton of sources that can inspire motivation; speakers, pictures of your dream body, watching other people do the things you wish for, or hitting a place in life were all you can do is pick yourself up and try. Wherever your motivation comes from, harness it to set yourself up. There are a bunch of resources out there to help you create a plan, all you have to do is pick one that relates to your goals and give it a try. The other factor that is notable to talk about it failure. Don't let failure deter you from feeling capable, instead use the failure as a launchpad to try something else that might work. Failure is never the end, it's another experience to learn from. If you find you are struggling after a big or small failure remember why you started in the first place. There must have been a dream or goal that made you want to grab it in the first place. For me, motivation is the catalyst that sparks the action. Once there is action there needs to be a plan and habits put into place to support them. Use the motivation every time it stirs in you and get after it. One final thing, it's okay to start again or to have an off day. The key is getting back at it because if you have a dream you are the only one who can make it happen and I would love to see you make it come to life.
Welcome to another Vote with your Dollar Thursday! Last week we talked about different fashion terms for becoming more conscious about how our clothing affects the environment. This week I wanted to give a couple examples of different brands and different cost points for those who aren't able to dive into spending too much on new clothing. I'm going to list 8 different brands and what they are known for. 1. Patagonia They are one of the first outdoor fashion companies that made a movement to more sustainable environmentally friendly clothing and accessories. They recycle a lot of there materials and they use organic cottons. They are a B-corp so they give back to the community as well. They are also fair trade certified. Their clothing and accessories are typically anywhere from $50-100+. They are more middle of the road in terms of pricing. 2. Pact Pact is a company that has focused on their process from the materials they pick to growing and harvesting them and then to making sure all sewing as well as packaging are as eco-conscious as possible. They also offer carbon-offsetting shipping options. They are Fair Trade certified. In terms of cost they are very affordable and are typically from $20-50+. 3. Able This company supports women who have overcome their own challenges. They are fair-trade, female-made, and a B Corp. They are affordable $20 to more expensive $200+ depending on what you are looking for. 4. Boden This company is fair trade, they use eco-friendly practices and sustainable cotton, they have an ethical supply chain and they give back. They are a UK founded company and focus on all different types of. apparel from Men's to women's and children's. They also have a great accessories collection as well. They are middle of the road $50 to expensive 200+. 5. Reformation They are made in the USA and offer sustainable as well as regenerative fabrics. They are carbon and water neutral. They support safe and fair working conditions while providing fair living wages. They are also very transparent and offer an environmental footprint for each article of clothing you purchase. They are on the expensive scale of $200+. 6. Thought Clothing This is another UK company that offers organic and sustainable fabrics, safe and fair working environments, and lastly they give back to the community. They are great basic pieces and specialize in creating timeless pieces of high quality. They are on the scale from affordable to middle of the road, $20-50+. 7. United by Blue United by Blue is a certified B Corp, they create their clothing and accessories from recycled and organic materials, they focus on ethical manufacturing, they are plastic free, and they give back to the community. They focus in outdoor and everyday apparel. They are on the scale from affordable to middle of the road, $20-50+. 8. Two Days Off Two Days Off is a USA based company that is woman-owed. They provide natural and deadstock fibers, are ethically made in small batches, they offer plastic-free shipping, are carbon-neutral, and have made it a mission to prioritize inclusive sizing. They focus on everyday apparel as well as the basics. They are on the scale from middle of the road to expensive, $50 - 200+. There are so many options out there that are both affordable and eco-conscious. This is where voting with your dollar can be huge. Instead of spending your money on fast-fashion brands like H&M or Forever21, you can move our economy towards more ethical practices by supporting those businesses that put an emphasis on the environment. If you have any additional brands that you love, please share below! Thanks for joining another Vote with your Dollar Thursday, make reasonable choices!